Projects

Showing posts with label DIY. Show all posts

Tuesday, November 22, 2016

Updates on the room most lived in.

We have been busy little beavers over here and I'm so excited that things are finally calming down, for a while at least.  It seems like we always get caught up in a crippling stand off when it come to house stuff, a battle of the wills..or will nots..or budgets..or screw the budget 
I WANT ALL THE THINGS!!

Okay snapping right back to reality now..  Everything we do around here runs on a tight budget and most of the time I like the challenge.  It's like a giant Tetris game of trying to make all the pieces fit with little time and just enough space,  some how I've figured out how to do most of what I want done and often times that involves a lot of good ole fashioned bartering.

It started with scraping the lovely 1980's popcorn off of our ceilings, which was exhausting but also convienient since I counted it as an upper body work out.  Seriously try being 5'2" and scraping over 400 sqft. of ceiling that is several feet over your head (up the ladder, spray, scrape, down the ladder, move the ladder, repeat often).


Once all that was done, it was sanding which made me look like the abominable snowman.  
Then priming and then painting the beautifully flat new ceiling!


After that we moved onto painting over the golden mustard colored walls that were all the rage with the tuscan decor style that I got sucked into over a decade ago.. :/  

They are now an amazing shade of blue/gray/green from Behr called Horizon Gray.


It's super cool how the wall color changes with the light, it's a light blue gray in the daylight and more of a green beige under lamp light.


Then the cherry on top... I spent my days painting sheds (another upper body workout) in exchange for a custom bookcase which was built for the back wall of my living room. We beefed up the trim and painted it Pottery Barn's  'Simply White'.  I would love to say there was a researched and tested train of thought behind picking the "perfect" white for the space, but honestly I was so fried at this point that I just  picked what Pinterest told me to and it ended up being perfect! 
YAY for a Pinterest win! 


That was what this space has been needing for so long!

Ahhh...  It's amazing how dumb I felt since it took me so long debating if I really wanted to put a bookcase in that back corner or not...  It completed the room and added so much instant charm and warmth, don't even get me started on the storage and practicality of it.


All of this had to be done back to back.. since our house is small and EVERY square foot of it is put to good use it's not like we could just sit back and take a break while we avoid the rooms that are "in progress".   There are no short cuts in our house, you really have to walk thru the whole thing to get from the kitchen to the bathroom, or bedroom, or upstairs, or back deck...  It may have taken a while but I am so happy with the outcome, I laugh and shake my head every time I think of how long it took me to get up the nerve and actually get it done.  

Life lesson...  Just do it!  Nike is so wise :)


Wednesday, October 7, 2015

Salvaged Wood Trees with a Story

 They don't build
them like 
they used to.


This is all that was left when I drove by.  As soon as we were in view my husband heard an audible gasp of disbelief and saw my watery eyes and knew exactly what had caught my attention.  His response was "oh, I'm so sorry honey"  an automatic response of condolence, like this was a personal affront to me.  In reality, although I have driven past this house pretty regularly since childhood this was not my house, I never knew the people who owned it or where the family is now, I've never been inside or walked the wraparound porch that graced most of this home.  Even so, to see it like this was heartbreaking to me and even worse is knowing that many more grand old homes are being torn down to make way for fancy new subdivisions.  

I know it's economics, housing for people moving into our area by the masses, people bring money, they find and create jobs, they boost our economy.  But it's just hard having been raised here and remembering all the dirt roads and barns and fields and ponds that have all disappeared and been replaced with houses and shopping.  I get it... I love to shop too. 

Thankfully I had my Hubby with me and we were riding in his big red truck!


 As my sweet and charming husband got out to talk with the demolition crew I sat patiently waiting all doe eyed in the passenger seat while our three year old was singing ' Twinkle Twinkle Little Star ' in the back (in broad day light). 

I saw the foreman look my way and shake his head, apparently his wife is crazy too because just then my hubbs waved me over.   He was sweet enough to walk around the perimeter with us and pulled out any planks of wood I pointed at.  Unfortunately most of the house was already down and carried to the landfill, so all we could see was just a pile of wood.  

We were able to get enough beaded board planks and trim for some projects but not much more than that.  So the other day I fired up the chop saw and went to work.  


 I loved how these trees turned out and that I know exactly where they came from.  Even if I can't save a whole house I'm happy that I can at least make something joyful from the destruction of it.


   *Angela*

Tuesday, April 28, 2015

Knock off art ~ an easy DIY


 As I was wandering down isle after isle of pure paradise at my local Home Goods I could barely keep my hands to myself.  I am definitely one of those tangible people,  
I have to touch all the things!  

My mother used to get so annoyed with me when I was young, everywhere we went she would let out an exasperated "put your hands on your belly" (embarrassed to say, I actually use that with my own handsy girl now).

By the time I get to that last isle, I realize that I can no longer afford all of the beautiful things that have graced my shopping cart.  Luckily it is easy to separate out the impulse buys, from the "I really have been looking for this" buys,  and then always the "well, I'm sure I can make something like this" buys.  Thankfully that is exactly the category this little beauty fell into.


 At $17.00 it's worth it to at least try and make it on my own.

As silly as it sounds, the "I love you more" battle is pretty constant in my family.  Not sure if we really do think we love each other more than the other or if it's just a battle of who gets the last words. Either way, this simple frame really struck a nerve with me. 

To create my own I gathered some supplies and got started. 


you will need: picture frame, paper with your saying printed as "mirror image", paint, and paint brush.

 Step 1:

Take everything out of your picture frame, you really only need to keep the glass to put back in. 

Step 2:

Lay your paper down, and cover it with the glass.  


Step 3:

Paint over the letters on top of the glass. 
This will let you end up with the paint on the back of glass once it's back in it's frame. 

Step 4:

Once the paint is dry, put it back in its frame and be sure to fold the tabs back down to secure.  If your frame doesn't have the small tabs like these it would be a good idea to run a line of hot glue around the frame and place the glass on top of that.  


I used an Ivory color paint so that it would stand out against our dark blue walls.  I love seeing it every morning while getting ready to start my day.


 *Angela*

Sunday, June 15, 2014

Happy Fathers Day & Handmade Gifts

Don't you love it when a Pinterest project actually turns out the way it is supposed to! 

I know I do, especially since we are doing a year of homemade gifts.  

Most of the time I can find a really cool DIY gift idea on Pinterest, then read the instructions and the supplies list is twenty pages long... Seriously? who keeps that much stuff on hand?  

Maybe I'm the only one with a teeny tiny house that gets overrun by a single pile of laundry,  really there is nowhere to hide mess in this house.   Man.. I long for the days of a bigger place where I can just shove stuff in an extra closet when company is coming over instead of having to clean the whole house to make it presentable.  

Not to mention spending $30 on supplies to make a homemade gift kinda defeats the purpose of the whole doing it to save/ not spend money aspect.

Getting back on track....

I found this super cool and easy Fathers Day inspiration from Kim over at A Spotted Pony

(A step by step will be posted soon)


This was cool because it really turned into a 2 for 1 kinda deal,  the blue shirt on the far right is how the shirt is supposed to look with a cool tye-dye effect.  Since I am not one to waste good crafty things I took the other piece and made the brown shirt in the middle so that it had the opposite effect as the original.  The grey shirt on the left was more of an oops that I doctored up a bit ;) 


With all the crafting and creative thinking going on I decided to try my hand at some homemade cards for the amazing men in our family as well. 

For this I decided to leave the computer closed! 

I adore Pinterest and all of the inspiration it provides,  however sometimes I see what other people are doing and think to myself "those are amazing whatever I end up with is going to look like a preschooler made it"  normally that wouldn't be a bad thing with all the crayons and markers and giant smiley suns in the corner of the page.  Unfortunately when you're going on thirty those cute hand drawn pictures of your stick people family and chubby puppy aren't going to cut it. 

I have a friend that tells me Pinterest is "where creativity goes to die", and I hate to say it but sometimes I think she's right.  I mean I think I'm pretty creative until I see everyone else is clearly more talented than myself and lose hope. 

So with the computer closed I set to work with everything crafty one could possibly need to make a Fathers Day card, and I have to say it is so much more fun to create and imagine without comparing what your doing to someone else.  

I am so darn PROUD of these cards!!!


I am in love with every aspect of every one of them!  For a moment I totally forgot how neat the shirts were I just wanted to show off their handmade cards that I did all by myself with no Pinterest to influence me!

Of course now I will post a picture of them onto Pinterest... 
What.. can you blame me,  they are super cute! 


Every now and then we just need to step back from technology and do what makes us happy :)

*Angela*

Tuesday, March 25, 2014

Rainy day love

Personally I LOVE rainy days!

Especially when you don't have to go anywhere or do anything, when you have the option to snuggle up with a cozy cable knit blanket while the baby takes a nap and you can sip on a glass of sweet red wine ( noon is a good wine time for me ) and you can really truly be one hundred percent focused on that really good book that you picked up from the $1.00 table at the flea market the other day. 

Yeah I wish my rainy day was like that too...

Instead my rainy day consisted of a little bundle of joy who just wanted to squeal instead of using her words, who had no interest in taking a nap even though her eyes were bright red, and a crazy puppy dog who is very vocal as well.  

We have a lot of animal drama around these parts. 

Honestly I thought my heart was going to explode from all the pressure building up as I tried my hardest to keep my composure, patience, and temper under control.  

So what do you do when life gives you lemons? 
You tell the baby to "find the puppies" which makes the puppies go into hiding, and also buys you approximately 15 minutes of peace and quiet.  Since the baby loves the puppies more than her own parents this can work a few times as long as you switch out the words "find", "hug", and "kiss".  

In this forty five minute time of bliss, be productive! Do something positive like baking some pretty fantastic Oatmeal Butterscotch Cookies that I found on Pinterest.  

Once my brain was put into a state of calm by the sugar endorphins, we all loaded up in the truck to go deliver some happiness and lull the baby to sleep in the backseat.  
WIN / WIN 


I love delivering surprises, and lets face it while eating two dozen cookies on my own is totally possible and has been done before I'm not going to lie, 
it's really not the best idea.  

So while we were out and about in a slow drizzly rain kind of a day I went ahead and raided the chicken coop for some fresh yummies to give to the neighbors.


We never actually buy eggs anymore so I have finally ran out of my egg carton stash.  Luckily I stumbled across this cute method of turning a paper plate into a little basket
I will never again buy gift bags, everyone from here on out will be getting adorable paper plate baskets! 

Hope you have found a way to enjoy your rainy days!

*Angela*

Monday, January 6, 2014

Burlap Coffee Poster

 I have seen the posts all over Pinterest where these super creative people use old grain sacks and turn them into the most beautiful things.  Pillows, table runners, upholstry... I mean the possibilities are endless.  However I had never really come across my opportunity to use such unique and functional burlap as something pretty to put on display....until I came across my first ever grain sack!

I assume that's the sort of thing you typically find at a flea market if your not distracted by all the adorable little puppies out for a stroll. 

 Lucky for me the adorable little pups didn't feel like freezing there adorable little puppy bums off like me.   *plus side*  I found a grain sack! 

And it's was for coffee!!!

Which I love! So I turned it into a poster!

I have had this poster shoved under my bed for at least a decade.  I figured someday I'll be able to use it.  (slightly a hoarder yes I know, but I hide all my hoarded things)

Guess what?  I was finally able to use it!

It's one of those $5 posters where the edges of the "frame" all come off to switch out the picture.


 All it needed was a little ironing, cutting, and hot glue.


 It's always a good idea to iron out all the fold lines, not to mention that helps for it to lay as flat as possible to the cardboard backer.


 Once It was all nice and flat again, I just used the clear plastic front as a template and cut around the burlap leaving about half an inch on all sides.  ( always leave room for error).


 Then just hot glue the edges in place,  I glued it directly on to the cardboard backer then trimmed the edges.  Gluing it down makes putting the sides on soooo much easier. 


 With the cardboard on the back you can hardly see the little hole in the burlap.


Then on goes the frame!


 It's nice to know that it was "clean coffee" in this bag, especially since a few 
of the beans made it home with me. 


* Angela *

Thursday, August 1, 2013

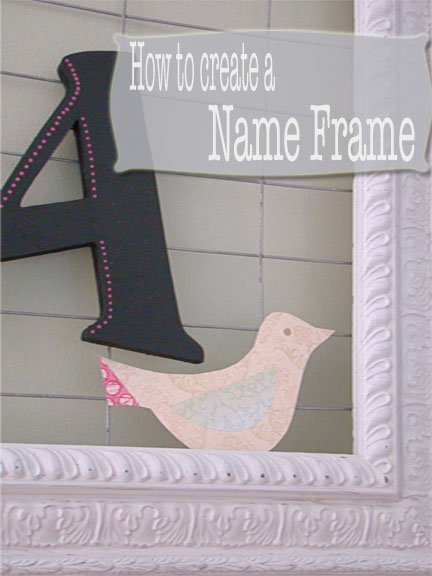
DIY~ Name Frame


For Lil A's room I needed something really big to go over her crib,  not just really big but also really cheap...(like almost free). 
 I knew she needed some art to stand apart from the pictures 
~ like how I said "she needed it" shes a baby, she only needs milk and diapers ~

So onward with the hunt for miscellaneous somethings I could put together to create art, isn't that what creativity is all about anyways?  

Lucky for me, I always have a stash of creative like stuff hiding out under my bed for just such an occasion!

Here's what I ended up scrounging around for, and figured out 
what I wanted / "she needed" to do. 

                             ~ Large frame (picture or mirror
                             ~ Paint of your choice
                             ~ Hard wire cloth for backing
                             ~ Tin Snips (for cutting wire)
                             ~ Staple Gun
                             ~ Wooden name pieces
                             ~ Decorative paint for name
                             ~ Twine or ribbon
                             ~ Measuring tape


Step 1.
  Find an old tacky gold frame that you may or may not 
             have broken the mirror out of (completely by accident).       Paint said frame with your color choice of paint. 


Step 2.
Measure the back of your frame making sure to have enough room to staple down your backing, and cut the backing you have chosen.

 
  I used large gauge hard wire cloth since that's what I had left from my garden.  Almost anything would work, chicken wire would be great as well.

 I later learned these were not the right tools to cut with,  but whatever... I hammer nails with my shoes, gets the job done.


Step 3.
Use a staple gun you feel comfortable with to staple the backing in place. (there was no way I was going to use my husbands air gun or I may be missing a finger).  I have a small electric staple gun that works perfectly well for small projects. 


 Step 4.
Paint up your name letters/ initials how you would like,
 

and staple a length of twine to the back, (again you can use whatever you like as long as it ties to the backing). 


Final Step. 
Arrange the name how you like and tie it in place.


Cheap and easy!


*Angela*